What are the Benefits of Metal Railings
People choose metal deck railings for their strength, longevity, clean appearance, design flexibility and because they require far less upkeep than traditional wood systems. Here’s a breakdown of the main benefits to consider when deciding whether metal railings are right for your deck.
- Safety: Metal railings are inherently strong and do not rot, split, or warp over time. That long-term structural stability helps the railing remain secure as the deck ages.
- Easy Installation: Many metal railing systems are sold as pre-engineered kits with pre-cut balusters and standardized components. Railing kits can simplify layout, greatly reduce installation time, and help ensure consistent spacing.
- Durability: Most metal railings are protected with powder-coated finishes that resist rust, corrosion, chipping and fading. This makes them well suited for rain, snow, humidity and direct sun exposure.
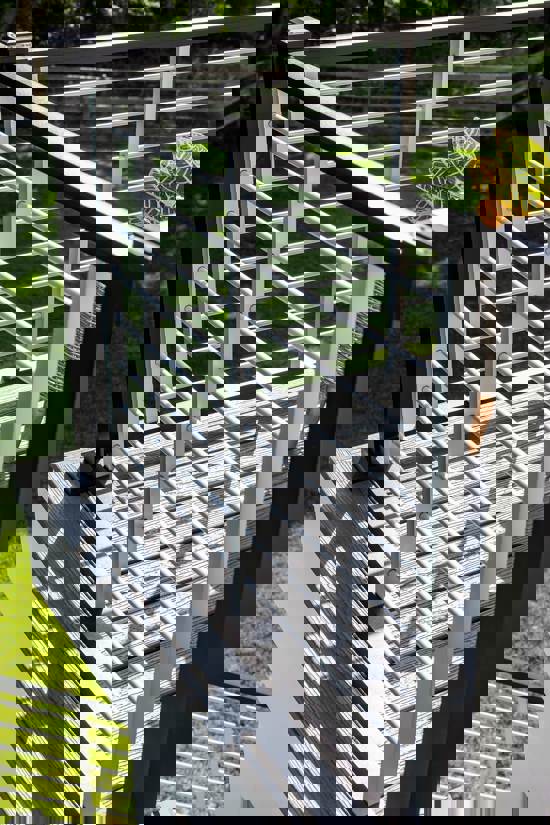
- Design Flexibility: Metal railing infill panels are available in a wide range of colors and options that include traditional baluster, horizontal rods, mesh, cables and glass panels.
- Low Maintenance: Unlike wood railings, metal systems do not require regular staining, painting or sealing. Occasional cleaning is usually all that’s needed to keep them looking good.
Types of Metal Deck Railings
There is more than one type of metal deck railing. Each offers different benefits in terms of cost, durability, appearance and performance. Choosing the right option often depends on climate, budget and design goals.
- Steel railings are a budget-friendly metal option that features excellent strength. One thing to consider is that although protective finishes are tough, damage to those finishes can make steel susceptible to corrosion in coastal, high-humidity, or persistently wet environments.
- Aluminum railings are lightweight, corrosion-resistant and well suited for all climates. Premium options are finished with a powder coating to provide durable, long-lasting color and added protection. Aluminum is the most popular choice for residential decks due to their balance between durability, cost and low maintenance.
- Stainless Steel railings are the most durable option, but because of their higher cost, they are more commonly used in commercial applications. The cables used in cable railing systems are the most common type of stainless steel found in residential railings.
Read this article for more information about the pros and cons of Steel vs Aluminum deck railings.
What to Consider Before Installing Metal Deck Railings
From meeting building code requirements to planning post placement, stair configurations and section lengths, a little upfront planning can prevent costly changes later. The considerations below will help avoid costly mistakes and ensure your installation goes smoothly.
Safety and Building Codes
Most metal railing kits are designed to meet common building code requirements and are typically available in 36-inch and 42-inch heights to satisfy the two most common standards. Other code considerations include baluster spacing and stair handrail height. It’s important to follow the manufacturer’s installation instructions carefully. A building permit will likely be required, so always verify local building code requirements before installation, as codes can vary from one municipality to another. Read this article on specific railing building code requirements to learn more.
Proper Blocking is Essential
Most metal railing kits rely on surface-mounted posts that must be anchored to solid blocking installed between the joists beneath them. It’s much easier to install blocking before the decking goes down, though it can sometimes be added later from below if the framing is accessible. Blocking requirements vary by railing system, so always follow the manufacturer’s installation instructions.
Installing Metal Railings on Stairs
Installing metal stair railings involves most of the same steps as installing railings on a level deck surface, but stairs introduce a few additional considerations. Some systems require posts and rail brackets specifically designed for stairs (more info on posts below). The top and bottom rails also need to be able to accept balusters at an angle. Some stair railing infill panels are pre-assembled and adjustable to accommodate a stairways unique angle and to maintain consistent spacing along the run. These are by far the easiest to install. In addition to the guard system, many stair railings also require a code-compliant handrail with specific height and graspability requirements. Read this article to find out more about handrail requirements.
Stairway width is another important consideration when installing metal railings on stairs. The stairs must be wide enough to maintain the minimum clear walking width required by most building codes. That typically means preserving at least 36 inches of clear space, with slightly less allowed when measuring from the handrail. Because most metal railing systems rely on surface-mounted posts, stairs framed at exactly 36 inches wide will likely end up noncompliant once posts and handrails are installed. Building code requirements vary by location, so always verify local stair and handrail clearance rules before finalizing your railing layout
Are All Railing Posts the Same?
There are two main considerations when selecting railing posts: location and height. Some railing systems use the same type of post for every location, including end posts, corner posts, line posts, and stair posts. With these systems, you simply install the appropriate rail brackets where needed: on one side of an end post that terminates at a wall, on opposite sides of a line post, on adjacent sides of a corner post, and angled brackets on stair posts.
Other systems have rail brackets that are pre-attached. These types of railings are easier to install, especially when working with pre-assembled infill panels. However, because the posts are not interchangeable, you need to carefully determine how many of each post type you’ll need before ordering.
When it comes to height, most posts are available in 36-inch and 42-inch options to meet common building code requirements. For more information, check out this article on the different types of guardrail posts.
How Long Are Metal Railing Sections?
Most metal deck railing systems are designed around standard section lengths of 6 or 8 feet. When planning a new deck layout, you can save time and money by designing railing runs that work within these standard lengths. For example, a deck that is 9 feet wide would require two 6-foot sections to complete, resulting in 3 feet of unused material and an additional post.
How Much Do Metal Deck Railings Cost?
Metal deck railing costs vary based on material, layout, and installation methods. Aluminum deck railings typically range from about $40 to $100 per linear foot for materials alone. Steel prices range $25 to $35, while cable railings cost anywhere from $80 to $150. The total cost depends on how much railing is needed and whether you install it yourself or hire a contractor. Read this article to learn more about railing costs.
Will a Metal Deck Railing Match My Style?
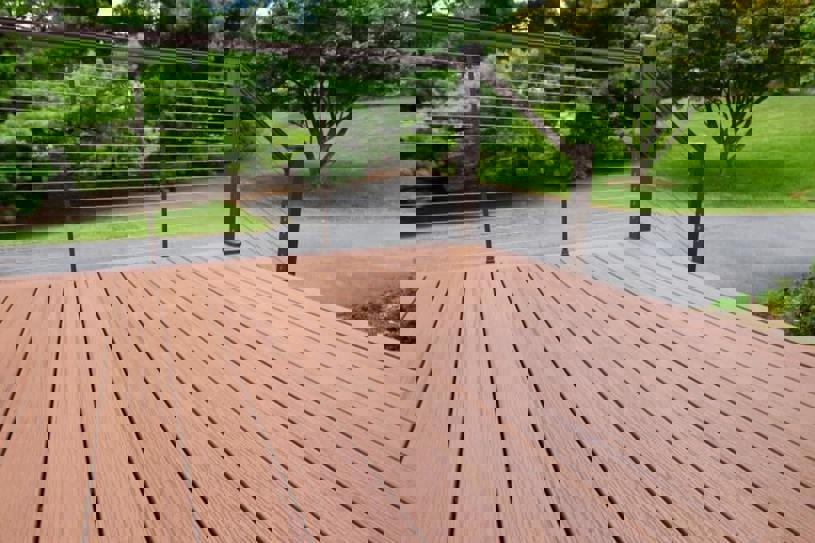
Metal deck railings are available in a wide range of styles that can complement nearly any architectural aesthetic. Steel railings typically feature a straightforward, functional design that pairs well with traditional architecture. Aluminum railings are more versatile and can enhance both classic and contemporary designs, depending on the profile and finish.
Aluminum posts and rails can also be paired with a variety of infill options, including hog wire, horizontal rods, cable or glass panels, complementing designs that range from agricultural and farmhouse-inspired styles to sleek, modern looks. For added function and visual warmth, many metal railing systems can be topped with a composite cocktail rail, which provides a comfortable surface for resting drinks while also softening the appearance of the metal railing.
How Long Do Metal Deck Railings Last?
Powder coatings help protect against rust, corrosion and exposure to chemicals, and metal railings are not vulnerable to rot or insect damage like wood. Aluminum railings do not rust because aluminum is a non-ferrous material. Powder-coated aluminum deck railings can last decades when properly installed and some are protected by warranties that last up to 50 years.
Do Metal Deck Railings Get Hot?
Yes, metal deck railings can get hot. However, surface temperature is influenced more by color, finish, and sun exposure than by the type of material they are made from. In shaded conditions, metal railings generally stay close to the ambient outdoor temperature. In direct sunlight, both aluminum and steel railings can become hot to the touch, especially during peak sun hours. Darker colors absorb more heat and will feel noticeably hotter than lighter-colored finishes.
Are Metal Deck Railings Easy to Install for Do-It-Yourselfers?
Yes, many metal deck railing systems are designed with DIY installation in mind. Railing kits typically include pre-cut posts and balusters. Some systems even include fully assembled panels, which can eliminate hundreds of individual cuts and fastening steps compared to site-built wood railings. The components are packaged in manageable sizes, making them easier to transport and handle than long, irregular lumber. Because the parts are factory-made and standardized, there is also less risk of warped, damaged, or missing components than with wood railing materials. With the proper tools, basic DIY skills and an enthusiastic helper, many homeowners can complete a metal deck railing installation in a single weekend. Find out more about the ease of railing kits.
How to Cut Metal Deck Railing
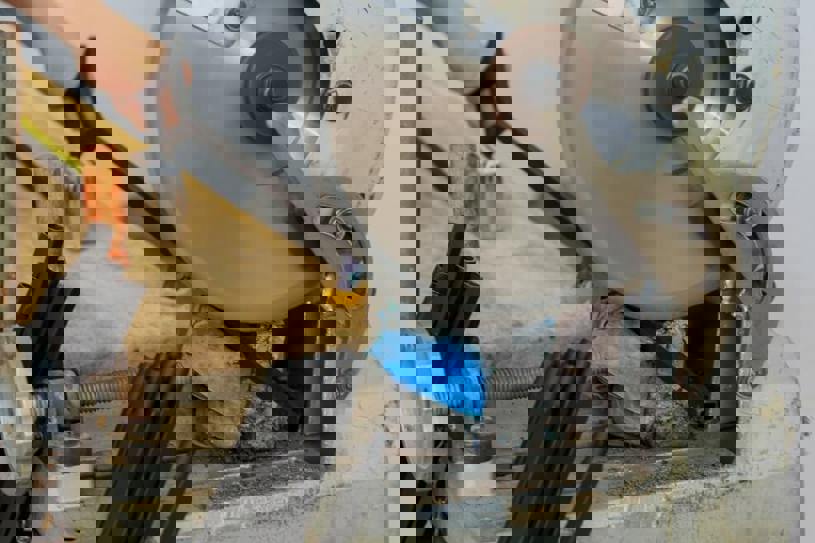
Aluminum rails can be cut with a standard circular saw fitted with a carbide-tipped wood blade. Choose a blade with a higher tooth count. For example, a blade with 80–100 teeth is a good option for a 12-inch miter saw. Do not use a circular saw designed for wood when cutting steel, even when using a steel-cutting blade. Designated steel-cutting saws typically spin at much lower RPMs. A steel blade installed on a fast spinning saw can overheat and fail. A reciprocating saw or grinder with a cut-off wheel are good options for cutting steel rails. An even better option is to plan your deck so the fully assembled steel panels do not require cutting at all.
Tools Needed to Install Metal Railings
Installing metal railings doesn’t require a full shop, but having the right tools on hand will make the job faster, safer, and more accurate. The exact tools you’ll need depend on the railing system and whether you’re cutting aluminum or steel components, but most installations rely on the following basics:
You'll need:
- Tape Measure for measuring post spacing, rail lengths, and cut locations
- Pencil or Marker for marking measurements and cut lines
- Utility Knife for general jobsite tasks
- Rubber Mallet for tapping components into place without damaging finishes
- Screwdrivers for tightening rail brackets and post caps
- Socket Set for tightening post base fasteners
- Cordless Drill/Driver with Bits for drilling pilot holes and driving fasteners
- Miter Saw with a blade rated for cutting metal
- Circular Saw (for trimming pre-assembled panels)
- Grinder with Cutoff Wheel (steel railing systems only)
- Speed Square for marking square cuts and aligning post bases
- Level to plumb posts and check rail alignment
- Chalk Line or String Line to keep posts aligned
- Clamps to hold components in place while marking or fastening
- Hearing Protection for cutting and grinding
- Safety Glasses
- Work Gloves
How to Install Metal Deck Railings Step by Step
Although installation details vary by manufacturer, most aluminum and steel railing systems follow a similar overall process. Every successful installation depends on carefully following the manufacturer’s instructions and confirming local building code requirements before you begin.
Step 1: Measure and Mark the Post Locations
Using a tape measure, mark the locations on the deck where the posts will be installed. Pay close attention to how the manufacturer specifies measurements, whether they are taken from the edges of the posts or from their centers. For long runs, divide the spacing evenly. For example, a 15-foot run would be split into two 7½-foot sections.
Use a speed square or framing square to ensure each post is aligned square/parallel to the edge of the deck. Once positioned, use a marker to transfer the screw hole locations from the post base onto the decking surface.
For long runs, mark and install the two outside posts first. Then tie a string between them and use it as a reference to mark the center posts, ensuring all posts are aligned in a perfectly straight line.
Step 2: Attach Posts to Deck
Using the marks you made on the deck surface, predrill holes to accommodate the screws or bolts used to secure the post bases. Fasten each bolt or screw until they feel moderately tight, then place a level on two adjacent sides of each post to ensure it is plumb (straight up and down). If adjustments are needed, you can sometimes tighten one or more fasteners to pull the post in the desired direction.
If tightening the fasteners does not move the post, loosen the fasteners and install shims beneath the post base as needed. In most cases, only paper-thin shims are required. If the post bases won’t be covered with trim, use shims that match the color of either the post or the decking, so they are not noticeable. Shims can often be made by shaving thin slices from composite or PVC decking boards or trim.
Step 3: Attach Rail Brackets to Posts
Once all metal posts are securely fastened to the deck, install the rail brackets (if they are not pre-installed on the posts). Rail brackets secure the top and bottom rails to the posts and establish proper rail height. Attach the brackets according to the manufacturer’s instructions. Most will require you to drill pilot holes to accommodate the mounting screws. You may need to use a tape measure to locate the brackets, though some manufacturers provide templates to simplify this step and to keep all the rails at the exact same height. If you have a bunch of posts to install and have no template, you can make your own from a scrap of wood.
Step 4: Install the Bottom Rail
Measure the distance between the posts at the bracket locations and cut the bottom rail to fit. IMPORTANT: Always trim an equal amount from each end of the rail so the spacing between the outer balusters and the posts remains consistent on both sides. In most cases, the rail must be cut slightly shorter than the measured distance to account for the thickness of the rail brackets. Reference the manufacturer’s instructions to determine how much length to subtract. Once the rail is in place, secure it to the brackets with the proper screws.
Some metal railing systems use what’s called a "baluster channel" or "insert" inside the top and bottom rails. These inserts have pre-punched holes or channels where the balusters are placed. When working with inserts, you can cut the outer rail to whatever length you need, and then it’s the insert that dictates baluster spacing. If you are installing pre-assembled infill panels, trim each of the four rail ends to size and slide the panel into the brackets according to the manufacturer’s instructions.
Step 5: Install the Balusters
Once the bottom rail (and insert if there is one) is in place, slide or snap each baluster into place in the bottom rail. Some installers find it easier to combine Steps 4 through 6 by preassembling both top and bottom rails and balusters and holding everything together with a strap. That way you can install the rails and balusters in the same way as a pre-assembled panel.
Step 6: Install the Top Rail
After the top rail (and insert if there is one) has been cut to size, install the top rail over the balusters. You’ll need to start at one end and work your way down the length of the rail, inserting each consecutive baluster as you go. This step can be tricky, and having a helper will make it much easier.
Step 7: Cap the Tops
After the balusters are in place, cap the tops of the posts to complete your metal deck railing installation. Install each cap according to the manufacturer’s instructions using the fasteners included with the kit. If you want to add visual interest or improve nighttime visibility, post caps with integrated lights and other post lighting options are available.
More Help Getting Started with Your Metal Deck Railing Project
Metal deck railings add strength, value, and peace of mind to your favorite outdoor space. If you’re still in the planning phase, use this Find a Retailer link to explore available metal deck railing options and pricing in your area. If you’d rather leave installation to a professional, visit the Find a Contractor page to connect with qualified installers who can help ensure your railing meets local code requirements.
Need more inspiration? Browse Trex® deck railing systems to see different styles, materials, and design ideas that may be a good fit for your deck.