It’s always best to remove existing layers of tired paint or stain from your wood deck before applying a new finish. This article outlines the mechanical and chemical removal methods commonly used and provides step-by-step guidance, so you can approach the project safely and with confidence.

When is it Time to Remove Paint or Stain?
Paint and stain both have a limited lifespan. As these finishes age, they can fade, peel, or wear unevenly, leaving your wood deck looking tired and more susceptible to damage from snow, rain, and UV exposure. Removing old layers of paint or stain helps new finishes adhere better, allowing them to last longer. Thorough removal is essential if you plan to change finishes, such as switching from paint to stain or applying a different color or product type.
Lead Paint Consideration: Many paints used prior to 1978 contained lead, so if your deck boards date back to that era—which might be the case if they have been protected by a porch roof—you should take extra precautions when removing those original paint layers. Learn how to remove lead paint safely here.
What Methods Are Available to Remove Paint or Stain from a Deck?
There are two primary approaches to removing existing paint or stain from a wood deck: mechanical methods and chemical methods. Mechanical methods rely on physical force to remove the finish, while chemical methods use specialized products to break down coatings so they can be washed or scraped away.
Mechanical Methods for Removing Paint or Stain from a Deck
Mechanical methods remove paint or stain through pressure or abrasion. Pressure washing uses a focused stream of water to loosen and remove failing finishes from the surface of the wood. Scraping involves manually removing peeling or flaking paint or stain with hand tools like a putty knife or paint scraper. Sanding relies on sandpaper, sanding pads or belts to remove finishes and smooth the wood.
What You Need to Know When Using Mechanical Stripping Methods
Mechanical methods can be effective, but they come with risks if used too aggressively. Excessive pressure from a pressure washer can erode soft wood fibers, leaving visible gouges and weakening the bond between the wood and future finishes. For more details on how to avoid these issues, see this article on using a pressure washer.
Similar caveats apply to sanding. Using overly aggressive sandpaper can leave scratches or swirl marks that telegraph through a new finish. The goal is to remove the existing coating without damaging the wood underneath, then use progressively finer grits to smooth the surface once the paint or stain has been removed.
Chemical Methods for Stripping Paint or Stains
Chemical stripping methods use liquid or gel products that soften and loosen paint or stain so it can be removed from the deck surface. These products are applied to the wood and are allowed to work for a set period of time, often called dwell time. Once the dwell time has elapsed, the chemicals are rinsed or scraped away.
What You Need to Know When Using Chemical Stripping Methods
Chemical strippers require careful preparation of the surrounding area. Overspray or runoff can damage nearby siding, concrete or metal surfaces, so those areas should be protected. Taking steps to control where the stripper goes helps minimize cleanup and prevents unintended damage.
You also need to protect yourself from the chemicals used to strip paints and stains by wearing the proper PPE like rubber gloves and eye protection. And don’t forget to consider the safety of children and pets, as well as the potential impact on grass, plants, and landscaping. Certain chemicals are harsher than others, so choose your product carefully. Strippers designed specifically for use on decks (vs those intended for furniture) are usually your safest choice.
Most chemical strippers are formulated to handle both paint and stain, especially those marketed for deck use. That said, some products are designed specifically for tougher coatings, such as multiple layers of paint. In some cases, chemical strippers work in conjunction with deck cleaners, neutralizers/wood brighteners. Always refer to the manufacturer’s claims about the capability of the stripper and recommendations regarding the use of supporting products.
Should You Use Mechanical or Chemical Methods to Remove Paint or Stain from a Deck?
The short answer is yes—most deck restoration projects benefit from using both. Start with a pressure washer to clean the surface and remove loose or flaking material. Next, apply a deck-safe chemical stripper to dissolve the remaining finish. After the stripper has had time to work, use a combination of a pressure washer and a scraper to remove the softened coating. Finish by sanding any stubborn areas and, if needed, the entire deck to create a smooth, uniform surface before applying a new finish. You will find detailed step-by-step instructions below.

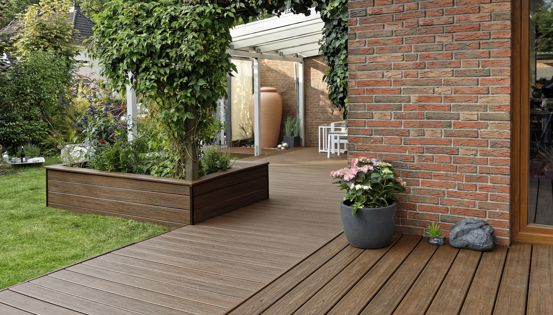
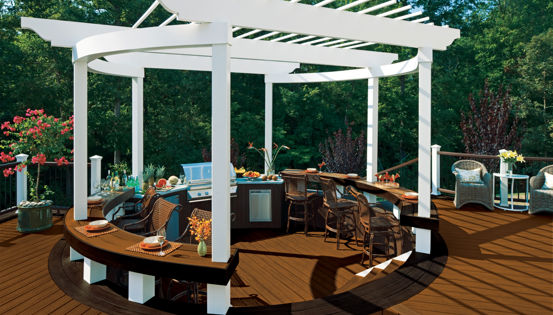
Paint-Free Decking Solutions
For homeowners feeling overwhelmed by the process of refinishing a deck, which, depending on conditions, may need to be repeated every few years, replacing wood decking with composite materials can be a practical alternative. Composite decking does not require paint, stain or sealers to maintain its appearance, eliminating much of the ongoing labor and cost associated with wood decks. Instead of scraping, sanding, and recoating on a regular cycle, composite boards are designed to resist fading, moisture damage and surface wear with routine cleaning. While replacement carries a higher upfront cost, the long-term savings in time, materials and maintenance, along with a consistently finished look, can make composite decking a more durable and predictable solution for many decks. Learn more about composite decking and find pro deck builder in your area.
Tools and Materials Needed to Remove Paint and Stains from a Deck
In addition to deck strippers, cleaners and brighteners, removing paint or stain from a deck requires a mix of protective gear, surface-prep tools, application equipment and finishing tools to complete the job safely and effectively.
PPE
- Long-sleeve shirt
- Chemical-resistant footwear
- Safety glasses
- Rubber gloves
- Mask or respirator
- Hearing protection (when running pressure washer engine)
Prep and Cleaning
- Tools for board repairs (will vary depending on the repair)
- Broom or leaf blower
- Pressure washer or garden hose
- Nylon-bristle brush
Applying the Chemicals
- Plastic and tape (to protect nearby surfaces and objects)
- Garden sprayer
- Plastic bucket (for mixing chemicals)
- Paintbrushes and/or roller
Removing the Chemicals
- Scrapers
- Putty knives
Finishing Up
- Belt sander and/or orbital sander
- Detail sander (optional, but handy for nooks and crannies)
- Sandpaper (a variety of grits)
- Wood putty (to repair cracks and holes)
Step-by-step Guide to Remove Paint or Stain from a Deck
Removing paint from a deck is a big chore. Plan your work, stage the materials and take it one step at a time. Always read and follow the manufacturer’s instructions regarding chemical application steps and safety precautions.
Step 1: Prep Your Deck
After clearing the deck of furniture, potted plants, etc., inspect it for rot and make any necessary repairs and take care of any popped nails or screws. Cover nearby shrubs with a tarp and mask off the siding and trim of the house using poly film and tape. Using a pressure washer or hand scraper, remove the worst of the flaking stain or paint.
Step 2: Apply the Paint and Stain Stripper to Deck
Paint strippers are typically either a gel that you apply with a paintbrush/roller or a liquid that you dilute and apply with a garden sprayer. Don’t skimp on applying the stripper but don’t be sloppy either. Work in small sections, nothing larger than 10 by 10 feet. Many products require the deck wood to be wet before applying the chemicals. Whenever possible, avoid working in the direct sun on a hot day. Even in moderate temperatures, you may need to apply more stripper or mist water over any areas drying too quickly. Always follow manufacturer’s application recommendations and safety instructions.
Step 3: Remove the Old Finish from Deck
Follow the manufacturer’s recommended dwell time, so the chemicals have plenty of time to work. Occasionally test a few areas to see how well the paint lifts off. Remove paint with a putty knife and then scrub with a stiff-bristled nylon brush. For thin layers of stain, a pressure washer might be all you need to wash off the chemicals and the old finish. Again, don’t overdo it by getting too close to the wood or setting the pressure too high.
Step 4: Rinse the Deck and Apply the Brightener/Neutralizer
Spray the deck thoroughly with fresh water to rinse off the paint stripper residue. Many chemical strippers will darken the wood, so plan to use a brightener/neutralizer to thoroughly remove all the chemical residue and brighten the wood back to its original tone.
Step 5: Sand and Prep the Deck for New Finish
Let the deck dry thoroughly, which could take several days depending on conditions. If the paint stripper, power washer and nylon brush didn’t get enough of the paint or stain off, use a sander to finish the job. An orbital or belt sander are good options, just make sure to select the right grit. Start with 80 grit paper or belts and move up to 100 or 120. You shouldn’t have to go much finer than 150 to remove any sanding marks. Always wear a mask or respirator when sanding.
Removing paint from the center of deck boards is relatively easy. It’s more work to remove paint at the corners and edges of boards and the hard-to-reach portions of the railings. If you plan to repaint or use the same solid stain you removed, don’t go overboard trying to get every last bit. If the old finish is well adhered, you can paint or stain right over it. When recoating with a semi-transparent stain however, you’ll need to get down to the bare wood everywhere. Lastly, fill any gouges with wood putty, and your deck is ready to stain or repaint.
More Information about Refreshing Your Deck
If removing paint or stain from your deck seems like a bigger project than you would like to tackle, here’s a tool to help you find a qualified pro in your area. And if you are contemplating building a new deck, check out these videos about how to build a new composite deck that won’t require frequent refinishing.