If your deck is elevated, especially if it’s a second-story deck, consider installing a DIY under-deck drainage system. It prevents water from passing through the deck and pooling below., Instead, the water flows into gutters so that the area beneath the deck stays dry and useable.
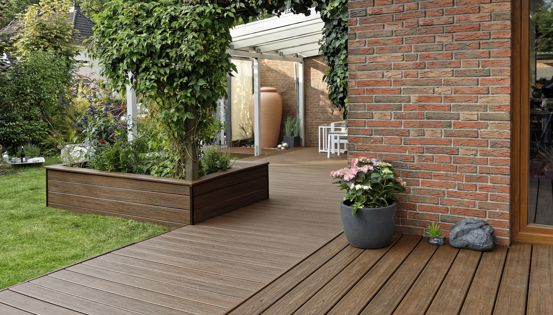
If you’re building a new deck on your home, get the most from your investment with an under-deck drainage system. After installing it, you can convert the space below the deck into a patio or use the space as waterproof under-deck storage.
Trex RainEscape, named among the Remodeler's Choice 100 by Qualified Remodeler Magazine, is simple to install and affordable. It is an over-the-joist deck drainage system, meaning it’s installed before you lay the deck boards. This type of deck drainage system allows you to finish the underside of the deck (the ceiling of the patio below) with lights, ceiling fans, and other accessories.

What to Consider before Installing an Under-Deck Drainage & Gutter System
Deck drainage and gutter systems can be installed above or below the joists. Above-the-joist systems like Trex RainEscape shield the entire substructure from water, protecting joists and fasteners against rot and corrosion.
Under-deck gutter systems that use below-the-joist panels can offer no such protection because some water always contacts the joists. In fact, the panels can accelerate decay by trapping moisture in the joist bays. Rotted wood can even fall onto the panels, impeding the flow of water and exacerbating the problem.
Plus, every below-joist approach, be it a retail kit or a DIY under-deck drainage system, makes it difficult if not impossible to install lights, fans, or other electrical accessories in the ceiling below the deck. With an above-joist under-deck drainage system that keeps the joist bays dry, there are fewer limitations.
Tools & Materials Needed for a DIY Under-Deck Drainage System
- Tape measure
- Marking pen
- Utility knife or scissors
- Staple gun
- Caulk gun
- Trex RainEscape downspouts
- Trex RainEscape troughs
- Trex RainEscape butyl tape
- Trex RainEscape butyl caulk
- Trex RainEscape rubber wall flashing
- Trex RainEscape 4x4 post flashing
- PVC, aluminum or steel gutter
- Hacksaw or jigsaw
- Cordless drill/driver
- Self-drilling screws
- Gutter hangers
- Gutter downspout
- Optional: Trex RainEscape Soffit Lights, ceiling fan, or other accessories
How to Waterproof under Your Deck with a DIY Deck Drainage System
Follow these installation basics for waterproofing the space under your deck using troughs that run between joists and empty into the system’s downspouts. If your deck has unusual angles, oddly spaced joists, railing posts inside the framing or other special cases, you’ll need to modify the troughs and downspouts to fit the space, but the approach is pretty much the same: Install the troughs and downspouts so that water flows to the gutter, then completely cover all joints with butyl tape.
Trex RainEscape is installed over the joists before the decking boards are installed, ensuring no water touches the joists. This protects the deck structure and foundation from water, prolonging the deck’s service life.
Some homeowners ask how to waterproof under an existing deck. This is not recommended, as it requires a system installed below the joists. Such below-joist deck drainage systems allow water to run through the deck boards, over the joists and into gutters under the deck. This repeatedly exposes the wooden joists to water and causes them to rot.
Want to Talk with Trex Professionals?
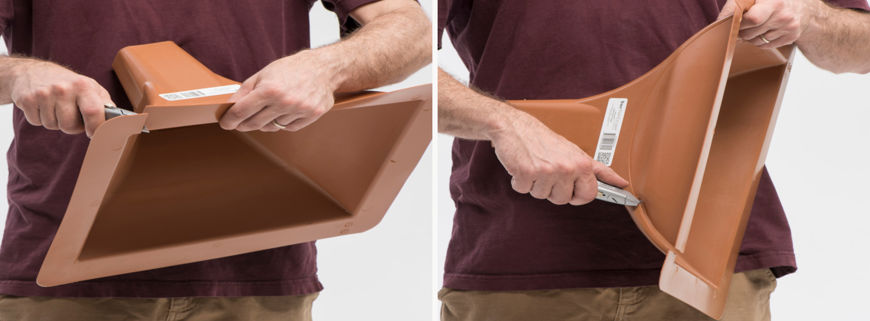
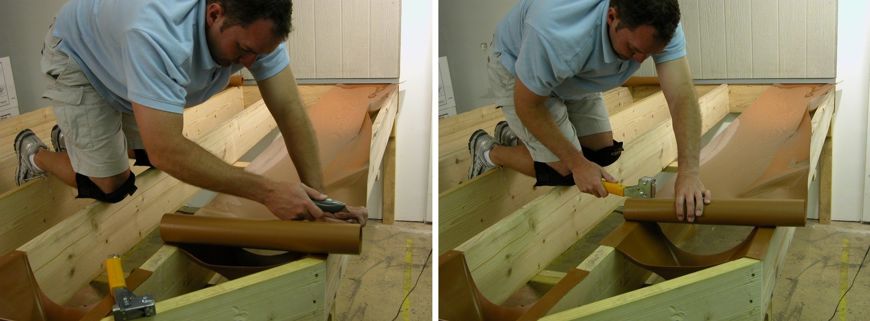
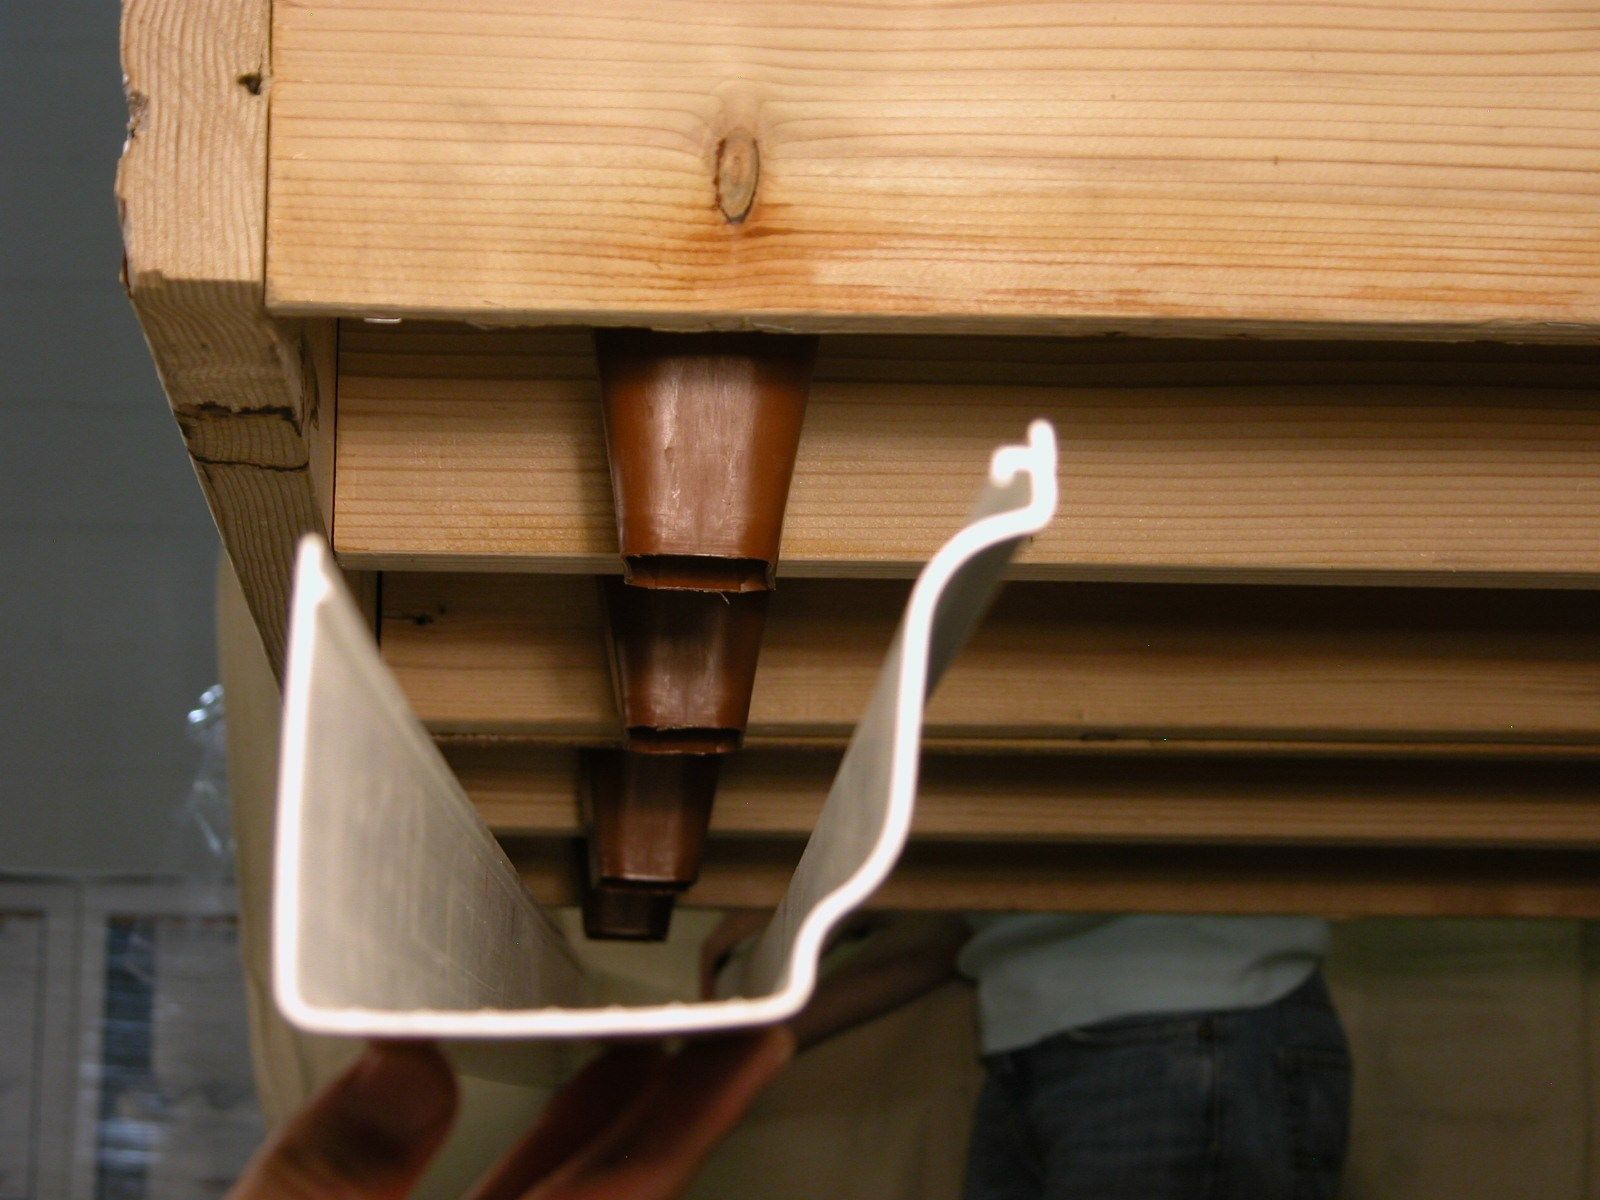
Cut your downspouts and install them along one rim joists
The RainEscape funnel-like downspouts fit between joists spaced 16 inches on center and, when turned 90 degrees, joists 12 inches on center. They can also be adapted to fit oddly spaced joists.
1. At 10 inches tall, the downspouts fit well with 2x10 joists. If your joists are smaller, cut the outlets of the funnels so that they extend 1 inch into the gutter. If you have 2x12 joists, add a section of PVC downspout to the funnel outlet using self-drilling screws. Next, cut a crescent-shaped section from one side of the funnel using a utility knife. Just follow the indicated cutline. Position a downspout in each joist bay at the rim joist where you will put the gutter, and staple them in place.

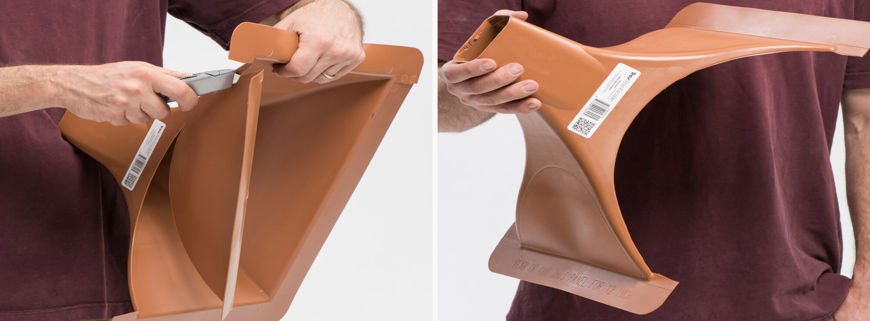
Slide one end of the trough under the wall flashing
2. Unroll a trough panel and allow it to acclimate (relax). Then fold it in half lengthwise to create a crease. This will help to form a trough for the water to travel along. Slip one end the material under the ledger flashing as far as possible, and staple it in place. Do not staple the flashing.
Staple and cut the trough to length
3. Staple one edge of the trough panel over the top of a joist so that it’s flush with the joist edge. Keep the trough taut as you staple it. (Have an assistant hold the other side of the trough at the ledger end to make the job easier.) When you reach the downspout, fold the material back tightly to remove its “roll memory.” Then cut it to length, with the end falling near the center of the downspout hole.
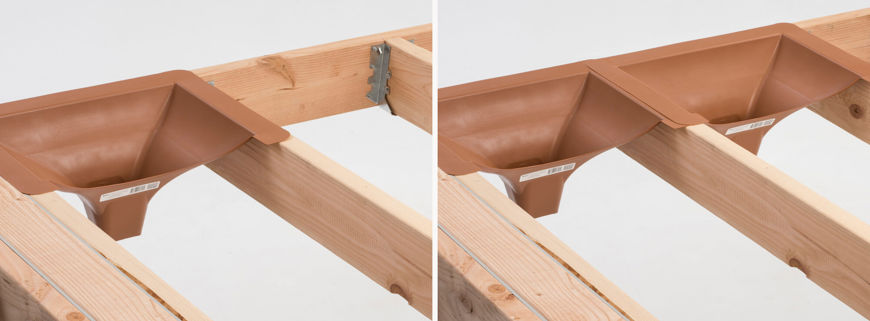
Staple and roll out more trough
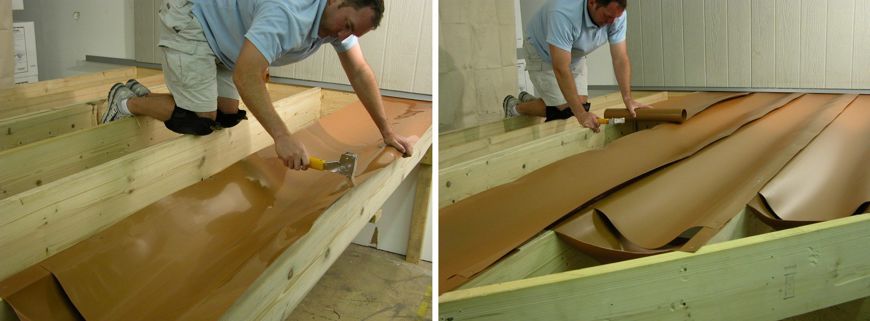
4. Following the guideline on the panel, continue stapling both sides of the trough. This will automatically create a slight slope for water to run down. Continue installing the trough panels in the other joist bays. Pour a cup of water into each trough to verify it drains properly.
Fill in the small areas at the angles
5. If there are angles or cantilevered sections of deck that cannot accommodate a downspout, make short trough sections and back-pitch them so that water flows to the longer trough and into the funnel downspout.
In difficult-to-tape places, it’s ok to use butyl caulk instead of, or in addition to, the tape. Make sure to apply it in a continuous bead.

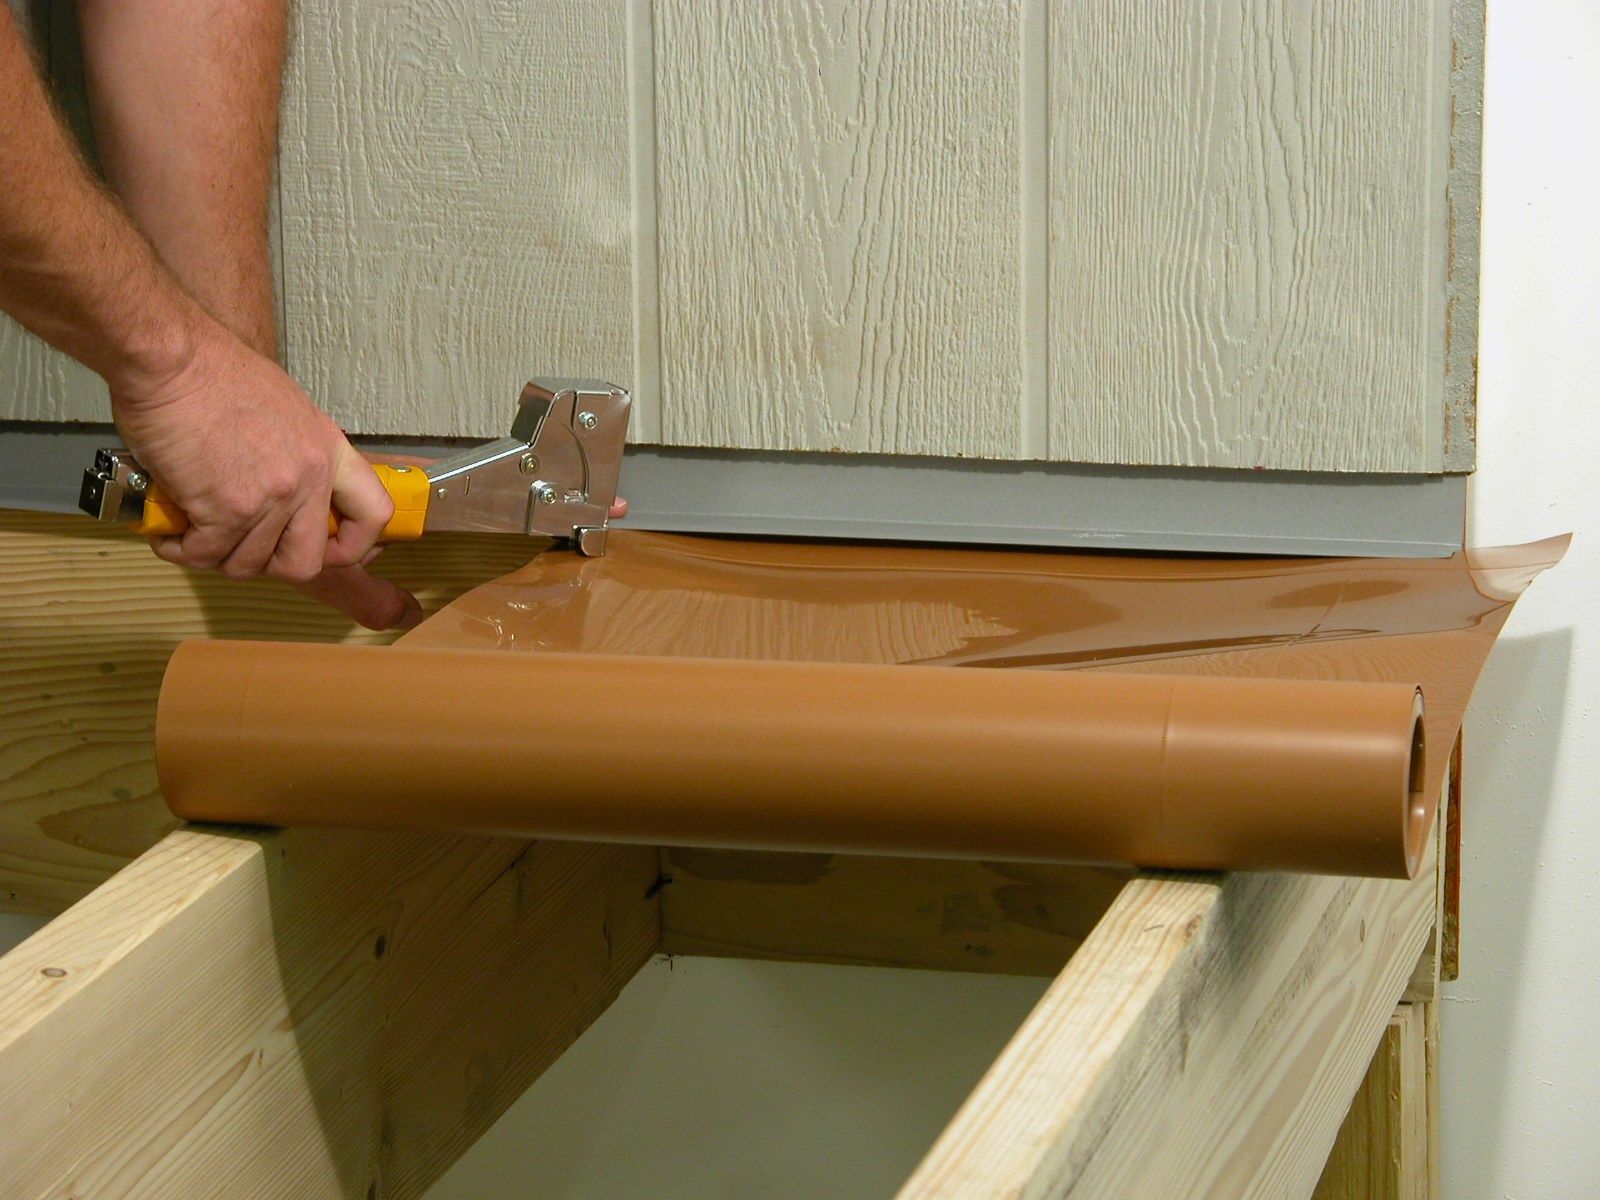
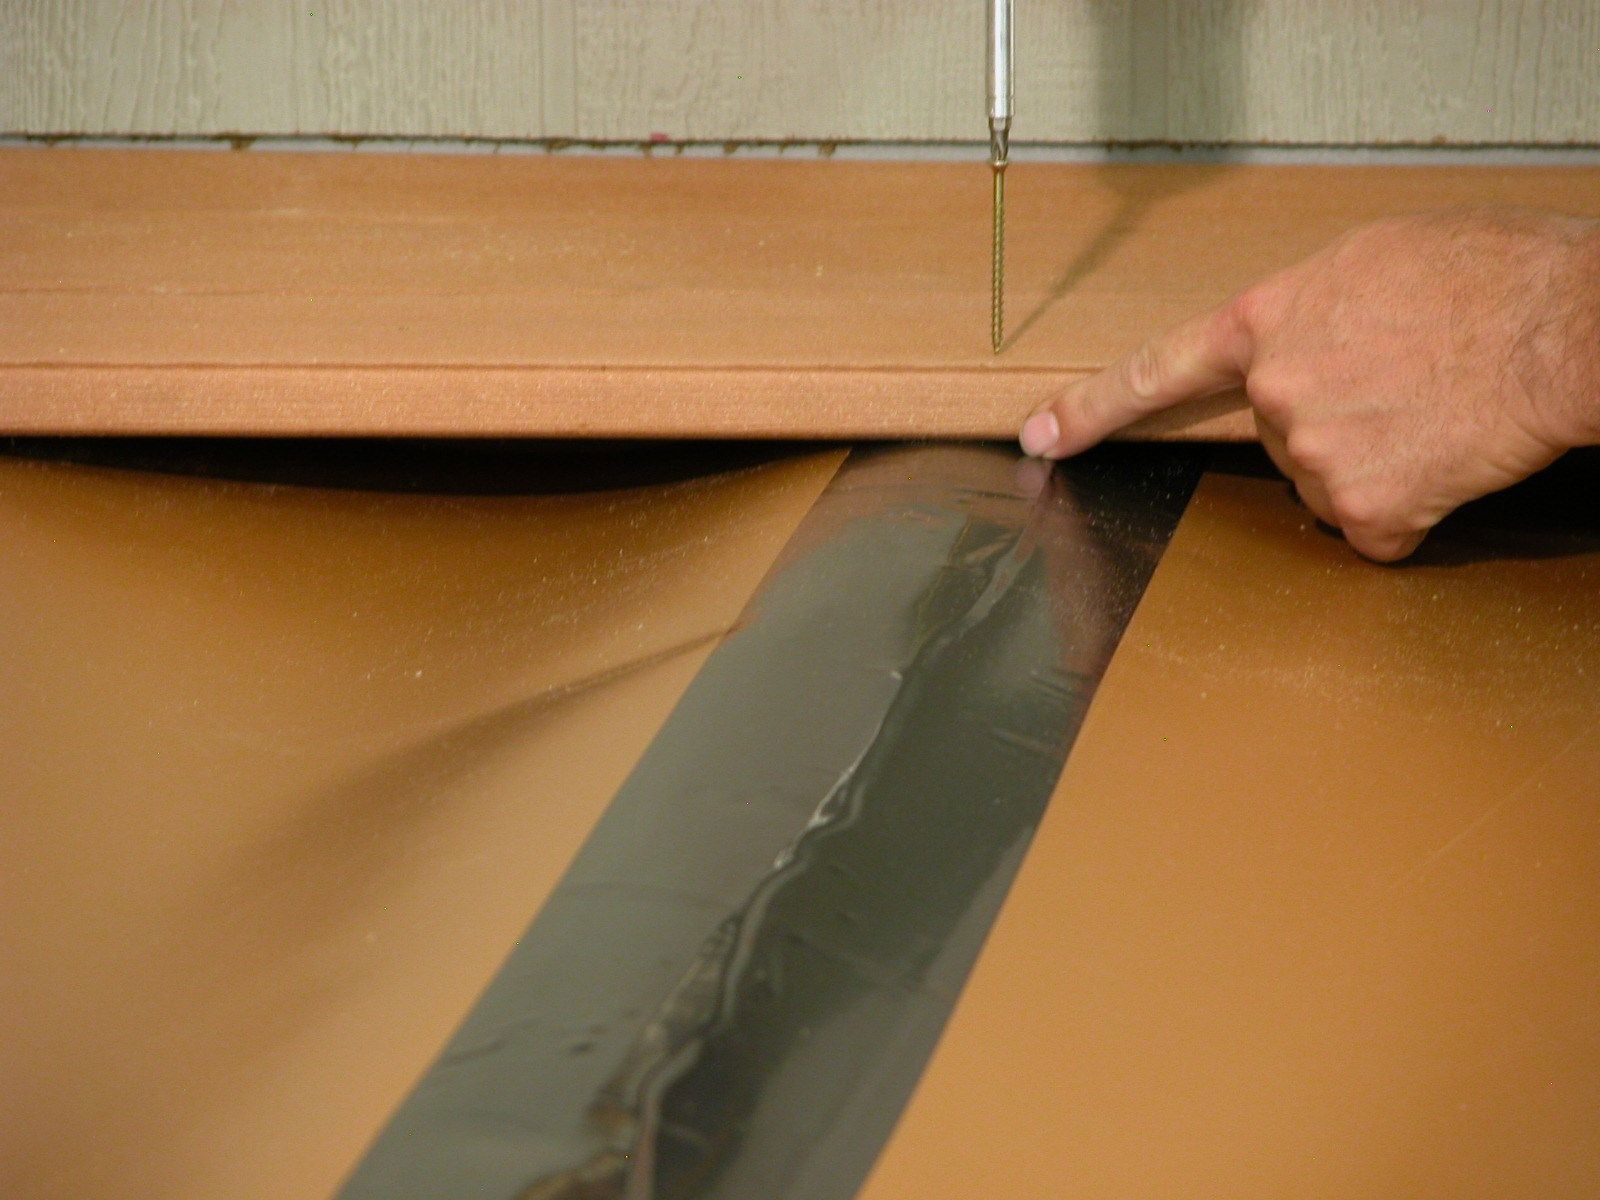
Cover the staples and joints with butyl tape
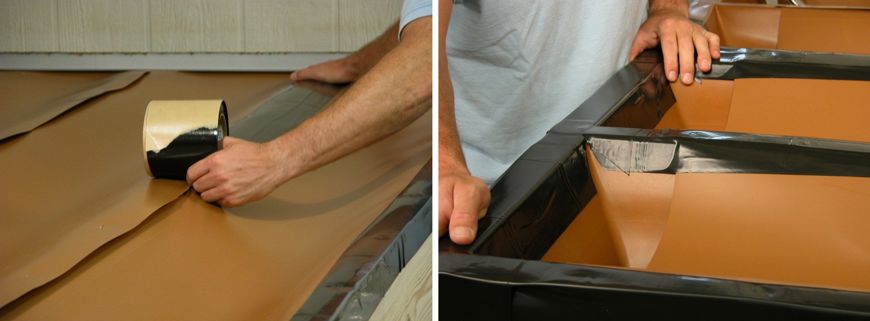
6. Use a utility knife or scissors to cut away excess overlapping trough material without exposing bare wood. Starting at the house end and working toward the downspouts, apply the butyl tape over the stapled trough ends by removing the paper backing as you unroll and apply it. Work carefully to keep the tape from wrinkling, and press down firmly so it forms a tight seal at all points.
Next, apply the tape along the outside edge of the downspouts. Slit the tape as needed to keep the seal flat. Press all the pieces smooth and tight. If you aren’t sure a joint is well sealed, apply more tape.
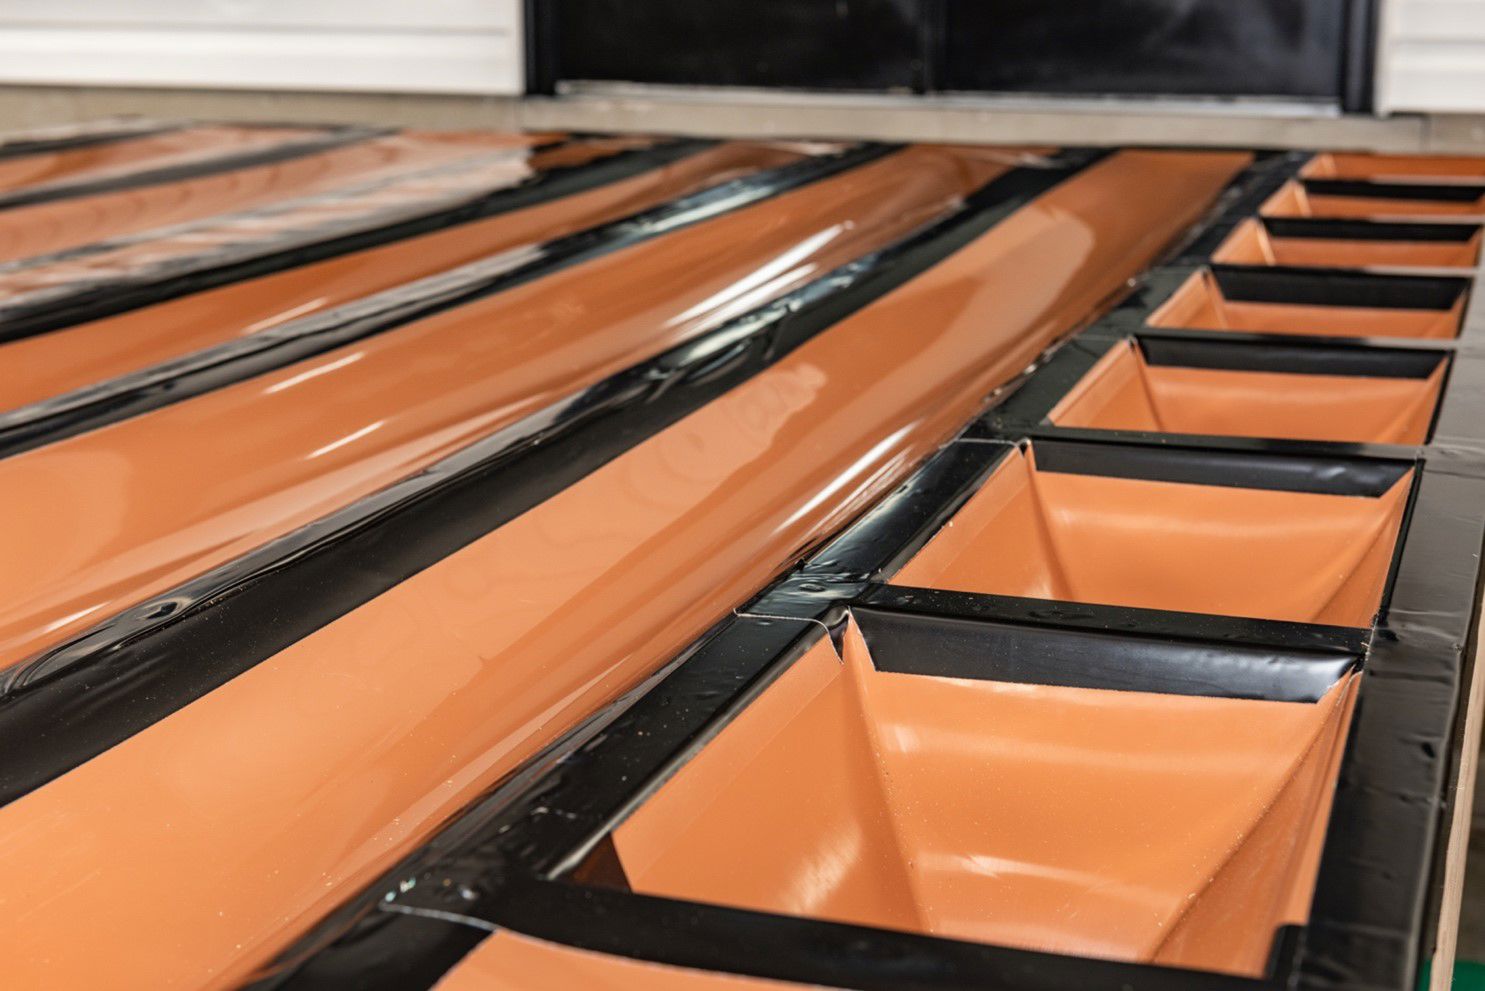
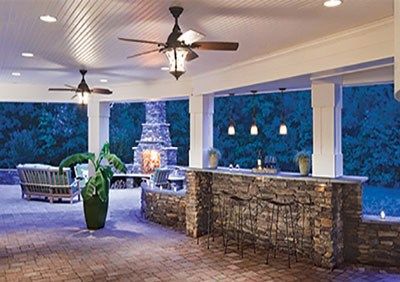
7. If you plan to install Trex RainEscape Soffit lights, a fan or other ceiling elements, you can do so now. Since this is an over-the-joist deck drainage system, all spaces below the deck stay dry.

Install the under-deck gutter
8. Install a gutter--PVC, aluminum or steel---so that it aligns under the downspouts, with each downspout’s outlet extending 1 inch into the gutter. The gutter should be slightly sloped—1/8 inch per foot is typical—so that the water runs toward to the gutter’s downspout.
Install the decking
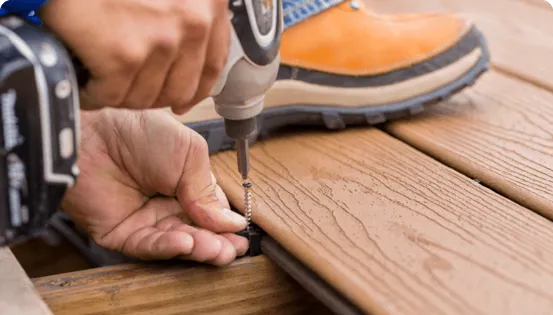
9. You can install the decking by face-screwing it or using hidden fasteners. The Trex RainEscape butyl tape forms a watertight seal around the screws as they penetrate the tape. Do not use nails to attach the deck boards.
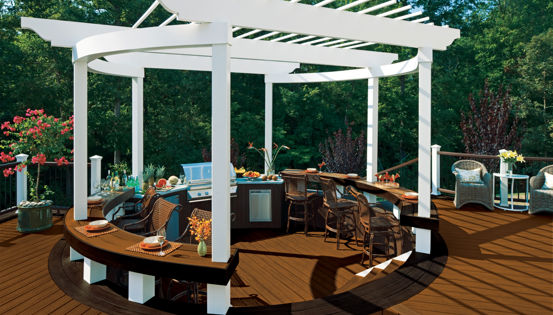
Is a Deck Drainage System Worth It?
An under-deck drainage system that keeps the area under your deck dry gives you a new space to store belongings and/or enjoy the outdoors. It also increases the value of your home. Plus, by protecting the structural joists from water, the system extends the service life of your deck. Few home improvements can provide such a big payoff for so little investment.
Get Started on Your Under-Deck Waterproofing Project
An under-deck drainage system that installs above the joists is the best option. It enables you to add overhead lights and ceiling fans in the space below the deck and doesn’t endanger the structural integrity of the joists above because they never see water.
Click here to find a contractor who can install an under-deck drainage system on your elevated deck.